Monday, November 7, 2011

Christmas Card 2011

Stationery card
View the entire collection of cards.
I may be REALLY BEHIND on blog posts (my work is seasonal...therefore, so is this blog!)...but I'm on the ball when it comes to ordering holiday cards! Just designed this card....in about 5 min, on Shutterfly.com!


Tuesday, April 5, 2011

What a Stud!

We're off to a great start!
Getting much easier to visualize how we are
going to use the space!!

Friday, March 25, 2011

Etsy: Hand Cut Paper

This post combines two of my favorite things....
Etsy and hand cut paper!
I love the look of hand cut paper, and it is an art I admire soooo much. I can't imagine the patience and steady hand it must take to create these images....two reasons why I will NEVER be a paper artist!

Here are a few shops I found who specialize in hand cut paper.

Above the Thistle Bush from ruralpearl by Angie Pickman
Check out her Etsy shop here:

Lovely personalized paper banners from Ay Mujer
Check out their Etsy shop here:

Sprinkler by Jessica Alpern Cuts Paper
Check out her Etsy shop here:

Karen O'Leary does had cut maps of cities from all over the world. Amazing!
This one is Berlin.
Check out her Etsy shop: http://www.etsy.com/shop/studiokmor
Happy shopping!

Tuesday, March 15, 2011

And so it begins......

The contractor showed up today to get started on turning our basement in to a wonderful, cozy, functional family space. I snapped these "before" photos to prove that this space is currently anything BUT wonderful, cozy, and functional (for more than anything but storage!).
It will be a long process....but in the end, we look forward to having a place for our family to hang out and watch movies and play games. A place to entertain friends and family and host many many sleep-overs!
I know home improvement projects are roller coaster rides....but right now we are just getting started up that big hill, and we're looking forward the thrill on the other side!
Let's see how long our enthusiasm can last!

Saturday, March 5, 2011

Channeling David Stark

I am constantly inspired and amazed at
the incredible ideas David Stark comes up with!
He is nothing short of a genius.....a total rock star
(from Mars even...just like Charlie!)!!


From whimsical to sophisticated, the simple to the sublime...he does it all! Whether you design children's parties, weddings, or backyard barbecues, you'll find some inspiration here! And if you design nothing at all.....you'll want to start after you check out his work.


I love the simple, graphic read of this "PARTY" grass wall. It would work great as a monogram at a wedding.


MOMA's Art Party in the Garden


This would be fun for a children's party with a "Mad Hatter" or tea-party theme!

Cooper-Hewitt National Design Awards
His paper flower pieces make me want to create a whole garden of my own. Such simple elements, really; but when done in mass it makes such a statement!
Sundance 27th Anniversary Celebration

Minneapolis Institute of Arts Gala

New Yorkers for Children Fall Gala


And he loves paint chips too!

Check out this space....the walls are covered in paint chips!

Design Industries Foundation Fighting AIDS


And these hanging curtains of paint chips are GENIUS!

Above and below: American Patrons of the Tate Gala


So if you're bored of checking out the latest blog posts (except this one of course!), and no one on facebook has anything interesting to say....head on over to David Stark's website (which is such a brilliant/fun design in and of itself!). You'll be glad you did!

Tuesday, March 1, 2011

Mosaic Tile Mirror Project

So with the basement remodel starting soon (if the contractors ever get their butts in gear!), my husband and I have been busy clearing out the basement. There was so much space to store things without being in our way...that I'd really forgotten what was there! After a couple car loads to The Salvation Army, we were left with a few pieces that we just couldn't "give away". I made my first ever sales on Craig's List (a queen sleigh bed and a Pottery Barn coffee table)...I would have done it much sooner if I would have known how easy it would be. Listed and sold both items within an hour! I was sooooo excited to have those items out of my basement/life--an awesome bonus that I made $160 on top of it!
Anyway....I was left with this mirror:

Target circa 1997.
I didn't have a place for it, and there is certainly nothing special about it, but I didn't want to just trash it either. My friend Chris is quite the mosaic expert, and it is something I've always wanted to try for myself. I have a little bit of mosaic experience, working on a large mural at my son's elementary school 2 years ago...but not enough to really feel confident in what I was doing.
This was a great project to experiment on. The wide, flat mirror frame made it easier to work with....and if I ruined the whole thing, I would have tossed it in the trash and not batted an eye.
Here is the final result:
I think it turned out pretty well....and this basement castaway will now hang proudly in our basement bathroom (if and when said contractors decide to start our project!).
I'm hardly qualified to give a tutorial....and there are already so many great video how-to's on YouTube, so I won't really try.
But I will show you a few details of my project and encourage you to try it for yourself. This mirror took me about 3 hours....spread out over 2 days because of dry times. If you don't have a potential trash-to-treasure project to rescue from your basement, try it on an inexpensive photo frame.

I love glass tiles...and I knew that was what I wanted to use. I picked up some "moonlite" and "sunrise" 1 inch tiles from Lowes for about $5. I loved this textured porcelain tile ($8), and was hoping to incorporate it in to the project; but once I got it home, it just didn't work for me.

Tiles from Lowes $18
Mosaic adhesive from Michael's: $1.99 (clearance)
Small bag of white sanded grout from Michael's: $.99 (clearance)
(as you can see...this is a pretty inexpensive project...especially if you subtract the $8 for the tile I didn't end up using!)

The first thing I did was tape off and paint the inside bevel and outside edge of the mirror white. This was easier than trying to cover it with tile later.
Next I laid out the tiles to try to determine the pattern I wanted.
I broke up the porcelain tile, and tried working them it...but I just wasn't feelin' it! I ended up using just the two colors of glass tile, in a random pattern.
I simply painted on the glue, allowed to get tacky, placed a bit more glue on the back of the tile, and stuck it to the mirror. Simple.
The project needed to sit overnight to make sure everything was good and stuck!


The next night, I mixed up the grout, used a wooden tongue depressor to apply it to the tiles, used a wet sponge to make sure it filled in all of the spaces, allowed to set a minute, and then wiped the tiles clean...until it looked like this:


The next morning I removed the tape, polished the tiles, and voila!


Could not have been easier! A brand new mirror for about $20!


Have you ever done a mosaic project?
Are you dying to try one now?!?!
I may have found a new addiction......
and I still need to use those fab porcelain tiles on something!

Sunday, February 20, 2011

Paint Chip Projects

So...I received a bunch of comments on the paint chip projects I made for my son's recent birthday party. I have to admit...I've always been a bit obsessed with those "free" little color cards of inspiration. I love color....and most of them I would NEVER actually paint on my wall...but it is such a shame to not use them in some way! I can't walk by a display without grabbing a few...even if there are no painting/decorating projects in my future. Caleb's art themed party was a good excuse to start using up my collection (and...okay...I did make several trips to the local paint stores to stock up!)
Duron had the longest strips I could find...7 color blocks! I cut these down, and used the remaing blocks to punch out the 2" circle. Added a small hole punch and some string...voila! (After I took the photos, I did end up using my corner-rounding punch to round all of the edges.)
Piece of cake! Even all of the adults at the party took one...a free and useable party favor--a great combination!


I also made these matchbook-style notpads from Duron paint chips. I folded the bottom flap up, rounded the corners with my punch, and stapled. I folded the remainder in half, and cut down some sticky notes to fit inside (1/4" smaller that the area within the paint chip). The sticky notes stuck to the paint chip, the flap folds down and tucks inside of the stapled flap....like a match book. It's a handy little memo book to tuck inside your purse....the adults loved them as much as the kids did!


I cut these flags for the cake stand from Behr paint chips. Their chips are large rectangles. I also used them to cut 2" circles for hanging garlands, favor tags, and cupcake toppers!


Now, I was pretty pleased with myself for finding, fun and inexpensive ways to decorate and make party favors. Those projects were pretty cute.....or so I thought....
But then I stumbled over to a new blog called Infarrantly Creative. (By "new" I mean new to me...she's been at this for YEARS!)
Beckie has the same fascination with paint chips....and she puts my projects to SHAME!
This is her version of paint chip memo pads---made to look like little purses!!
The video tutorial is available on her blog here.


And if you think those are AMAZING...check this out! Beckie even makes JEWELRY from paint chips! It's pretty simple too...check out her video tutorial.
And Beckie's latest blog post is 5 Ways to Use Paint Chips.
(that's right....5 more projects to put my bookmarks to shame!)
Thanks for the 'Foxy Inspiration' Beckie...can't wait to see what you come up with next!

Monday, February 14, 2011

Calling All Artists: It's Party Time!

This past weekend was my son's sixth birthday party. He had 5 of his friends over for an art party on Saturday afternoon, then the artistic theme continued with a fun day with family on Sunday. It was a really fun theme to work with! Everyone seemed to enjoy the parties....but most importatly Caleb thought it was just awesome. We wanted to share some photos of his parites, in hopes that someone else would be inspired to have an art-themed party of their own!
It all started with one adorable, creative, and EXCITED birthday boy:

The theme was his idea. He came up with suggestions for decorations, activities and food. Of course, I had a few surprises for him...but he was a big part of planning and creating his party (just as it should be!).


Some simple invitations and thank you notes designed on Zazzle.com:
Some homemade decorations: 
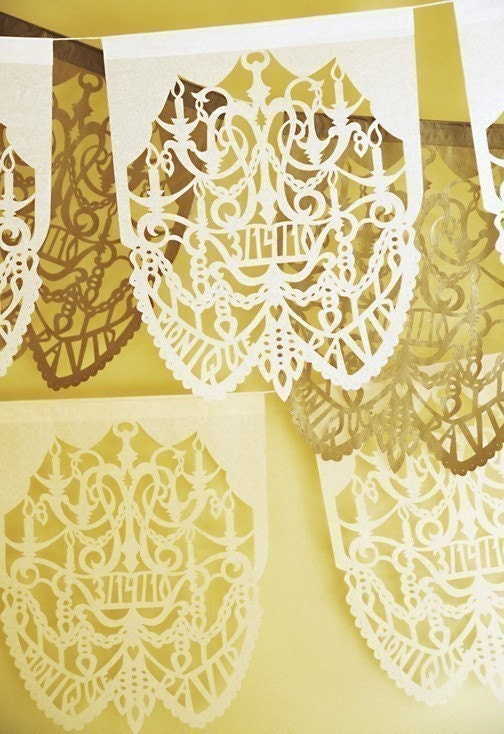
A welcoming banner painted by the birthday boy himself, a chandelier of tissue poms, and a balloon centerpiece (Art billboard by The Purple Pug)


Of course there was a snack table!
Obviously color was a big part of the theme! Goodies included: rainbow colored Goldfish, M&Ms, Skittles, pretzel rods, edible crayons (pretzel rods dipped in candy melts, wrapped with crayon paper), fruit kabobs, water, and Switch sparkling fruit juice (my new fav! Colorful cans, and no added sugars or artificial colors.)


Details of the goodies:

I made flags for the straws with famous quotes about art, the kids had a chance to get creative while decorating their own cupcake, and the mini cherry pies were served at the family party (along with the colorful cake below!).

The Activities:

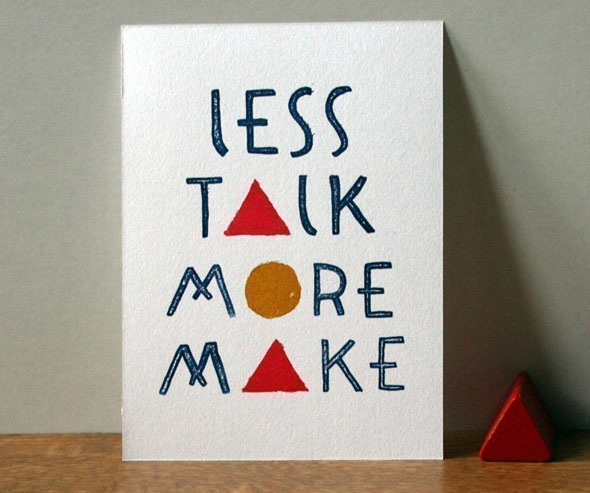
There were several art related activities.

  • Caleb wanted to play bingo, so I created an art themed bingo sheet using Picasa. (FREE!)
  • I found coloring sheets of famous masterpieces at SuperColoring.com. They had everything from Matisse to Andy Warhol! (FREE!)
  • We drew self portraits. The kids enjoyed studying the shapes of their heads, eyes, and noses in their hand-held mirrors!
  • The kids also painted their own lizard toy (we needed one messy activity!). ($1 each from Michael's)
  • Caleb came up with the idea of Freeze Drawing. Much like the traditional party game Freeze Dance, but--you guessed it--they drew! Actually, they ended up in a free-for-all dance by the end of the game.....they just couldn't contain themselves when Taio Cruz's "Dynamite" came on!!
  • Total cost of all party activities $1 per child!


The big thrill for Caleb at the family party was his cake. He had great fun helping me make the cake batter. He measured all of the ingredients, added all of the food coloring, and cracked all the eggs!


The bunting for the cake stand was made from paint chips (I love paint chips!) cut in to flags and taped to the glass, then I covered the taped edges with the black polka dot ribbon. The cake was inspired by the rainbow cake over at One Charming Party.
The recipe for the icing, aptly named "That's the Best Frosting I've Ever Had", is from The Pioneer Woman's Tasty Kitchen Blog. And let me tell ya....it's named that for a reason. I'm not a big icing eater...but the whipped-cream like frosting was DIVINE!! We opted for fudge frosting in between the layers, because we thought the chocolate would be a nice touch (plus I think it helps the over all color-effect!).
The cake was topped off with a perfectly adorable cake billboard from glittery gal Kristy over at The Purple Pug. These should be showing up in her online store soon.
Caleb enjoyed tricking the guests, telling them, "my cake is soooo white and booooring".....he LOVED the "oohs" and "ahhs" as I cut in to it.


The Favors:
Each child recieved an art kit and bookmark. They ended up being the most economical favors I've ever handed out....yet they are actually useable!! How often do our kids come home from parties with goody bags of junk that ends up right in the trash? I didn't want to do that...but didn't want to spend a fortune on them either. The bookmarks are made from Duron paint chips...obviously, they were free. The art kits were at Michael's around Christmas time for $2.99! A steal! I wrapped them in colored paper, tied on a ribbon and two tags. One was a thank you message from Caleb, the other a quote from Picasso that said "Every child is an artist.".
It really was great fun to plan this party...and great fun to attend it! Can't wait to see what Caleb comes up with next year!

Saturday, February 12, 2011

VOTE FOR ME! A Shameless Plug!


My Fingerprint Portraits were nomintated as a finalist in The Knock It Off Contest on the seven thirty three blog! Please vote for me....my ego could really use it! ;) Actually....there are a lot of really great knock off projects in the running (okay....a lot are better than mine!)....but most require sewing--and I'm not good with the needle and thread! Go check out the projects, pick your favorite....and then vote for me anyway! ;) Vote here!

Thursday, February 10, 2011

Get Your Indie Fixx here!


print by Jen Collins of hellojenuine


I am loving what I'm seeing on the design, crafting, gardening, cooking,
um.....can I just say "lifesyle blog" Indie Fixx.
Yes, they have a fox in their logo....but that's not the only thing I love about them. Jen Wallace is the foxy chick behind Indie Fixx (and I was almost done writing this post when I noticed a link to Baltimore Etsy--she's a Maryland girl too!) She features the work of Indie artists and designers....a feast of eye candy.

There is even a mall where you can buy it all, the Indie Fixx Galleria.

Tuesday, February 8, 2011

Quick Tips: How to Make Heart-Shaped Cupcakes

Ever wonder how to make heart-shaped cupcakes...without investing in a heart-shaped pan?
It is even easier than I imagined! Definately going to use these for our class Valentine's Day party (which also happens to be my son's birthday!).

Thanks to Stylin' Stix Studio for sharing!


Thursday, February 3, 2011

Dr. Pitt---even cooler than his brother Brad!

I've been having so much fun imagining how we will decorate our basement once it's finished (and construction hasn't even begun yet...so I've got a lot of time to play around here!). We don't have much natural light down there...so we'll need to brighten it up with some bright creamy fabrics, glossy white woodwork, and a big brass chandelier. Oh...I can imagine myself down there now...curled up on the suede covered Henredon sofa under a cashmere throw sipping tea--wait---aren't suede and cashemre dry clean only? ....Yep...that's not going to cut it around this house! And, let's face it, as much as I love the picture above, it certainly isn't practical for a family with two small boys who believe bodily noises are hysterical (and a husband who agrees!). Our new family room will be all about movie watching and video game playing. It really should have padded walls, inflatable furniture, and a drain in the middle of the floor so that I can just hose things down when necessary.


BUT THEN I CAME ACROSSED THIS....


Hellllllooooo Dr. Pitt!
(really, that's what it's called!)

Now this is what we need for our basement! I remember seeing these sectionals by Mitchell Gold + Bob Williams years ago, but didn't have the need back then.
Yep....as far as my boys are concerned, this is all we need.
Well....maybe a 60" plasma screen tv for the PS3 and a fridge full of soda too!